-This post may contain affiliate links-
This week I am joining a few other craft bloggers in a Creative Crafts Blog Hop. The theme is Recycled Crafts. You can see all of the projects at Laura Kelly Designs, Creatively Beth, and Makeable Crafts.

It took me a while to come up with a project that would involve recycling or repurposing something. I had a few thoughts but wasn't super excited about any of them. Then I remembered the bags of clothes and thought surely I could find something to do with outgrown or worn out clothes.
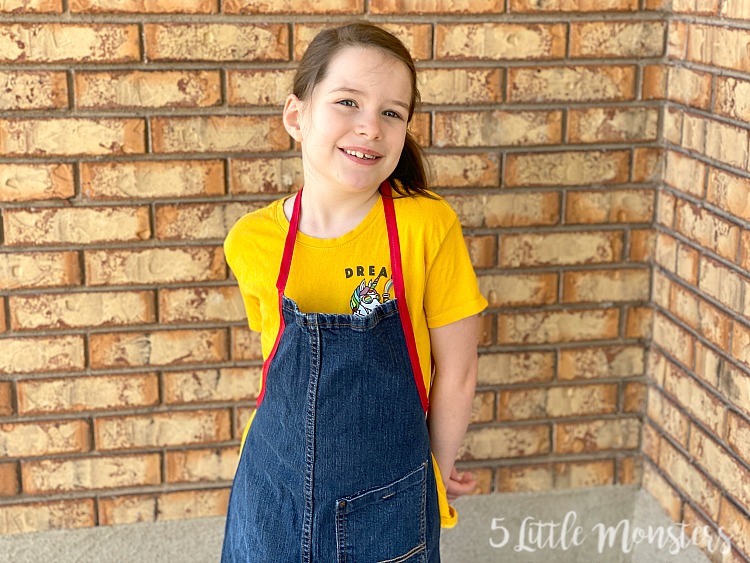
I found a couple pairs of old pants including a pair of jeans. I thought they would make a perfect kid's craft apron. The ones I uses were a bigger boys size, you will want either a large child size or adult size so that the leg is wide enough to make into an apron.
With just a few cuts, a little bit of hemming, and a length of bias tape it didn't take long to turn an old pant leg into a child size apron perfect for all of the arts and crafts and messes they can make.
How to Make a Recycled Denim Apron
You will need:
- an old pair of jeans or other heavyweight pants (you will want jeans with a wider leg and bigger size so you will have plenty of width, mine were boys size 14 Husky)
- bias tape, 54"-60" length (I used single fold bias tape 7/8" and folded it in half as I sewed)
- scissors
- sewing machine
- coordinating thread
- pins
Instructions:
I did not make a pattern to cut out my apron, I just kind of eyeballed it as I cut. Since you are starting with a piece of fabric that will be slightly different with each pair of pants I thought it would be easier that way, and it is a pretty simple shape. I will give the basic measurements that I used to make the apron.
First you will want to cut the leg off close to the top so that you get as much length as possible.
Next cut along both sides of the outside leg seam, removing the seam completely. This gives you a flat-ish piece of fabric to work with.
The bottom, hemmed edge of the leg will be the top of your apron.
Fold the leg in half and trim the sides so that they are even.
Cut curved armholes along the top sides. You can eyeball it or use another apron as a pattern. I cut mine so that the top hemmed edge was 8", the curved section for the armhole went from that top edge down the side about 8".
*Note: the seam will not be perfectly centered in the front.
If you want to add a pocket to the front of your apron cut it from the back of the jeans.
Sew a narrow hem along the straight sides and bottom edge, leave the curved sections unhemmed.
Cut a length of bias tape between 52"-60" long, or as long as you need to wrap around the waist and tie, go up the armhole part and around the head.
Fold the bias tape to find the center and measure 9" on each side of the center (this gives you an 18" section), put a pin in those spots. This will be your neck section, if you are making it for a smaller child than I did you may want to make it a little smaller, just make sure it is big enough to pull over the head.
Pin the bias tape to the curved edges, enclosing the raw edge in the bias tape, with the pinned section you just measured left between the two sides.
Sew all the way along the bias tape starting at one end, sewing along the curved armhole, then the neck section, the other curved armhole, and then the other end. This will create your neck strap and ties while also finishing the curved edges.
Last, if you are adding a pocket sew it onto the front of the apron wherever you choose. I put it down on one side below the waist, but it would be cute centered at the top too, or you could even add 2 pockets, one on each side.


No comments :
Post a Comment